
My Mother In Law, Jacqueline makes us these wonderful 1/4 cup ghee servings and brings us them by the bag! Here is her recipe…..
My granddaughter has a dairy allergy, but she can eat ghee. When I started on out on making her gluten free and dairy free treats, I used the 13 oz. Jar of ghee you get at the natural food store. It was expensive! And really not user friendly…how do you get that solid stuff out of the jar? I just looked online and saw that 13 oz. jar is selling for $11.00! Ghee is incredibly easy to make and you can make 23 ounces of organic, unsalted ghee for about $9.00. One of the “cakes” of ghee you’ll make is 4 tbls. So it is very easy to know how much to use in a recipe. Getting set up is probably the hardest. You’ll need:
- a muffin pan for 12 muffins (cupcakes)
- 12 silicone cupcake liner
- 3 qt heavy sauce pan
- large bowl-I use my Pampered Chef 8 cup batter bowl
- stainless steel strainer
- cheesecloth (kitchen use grade)
- ¼ cup measuring cup

set up
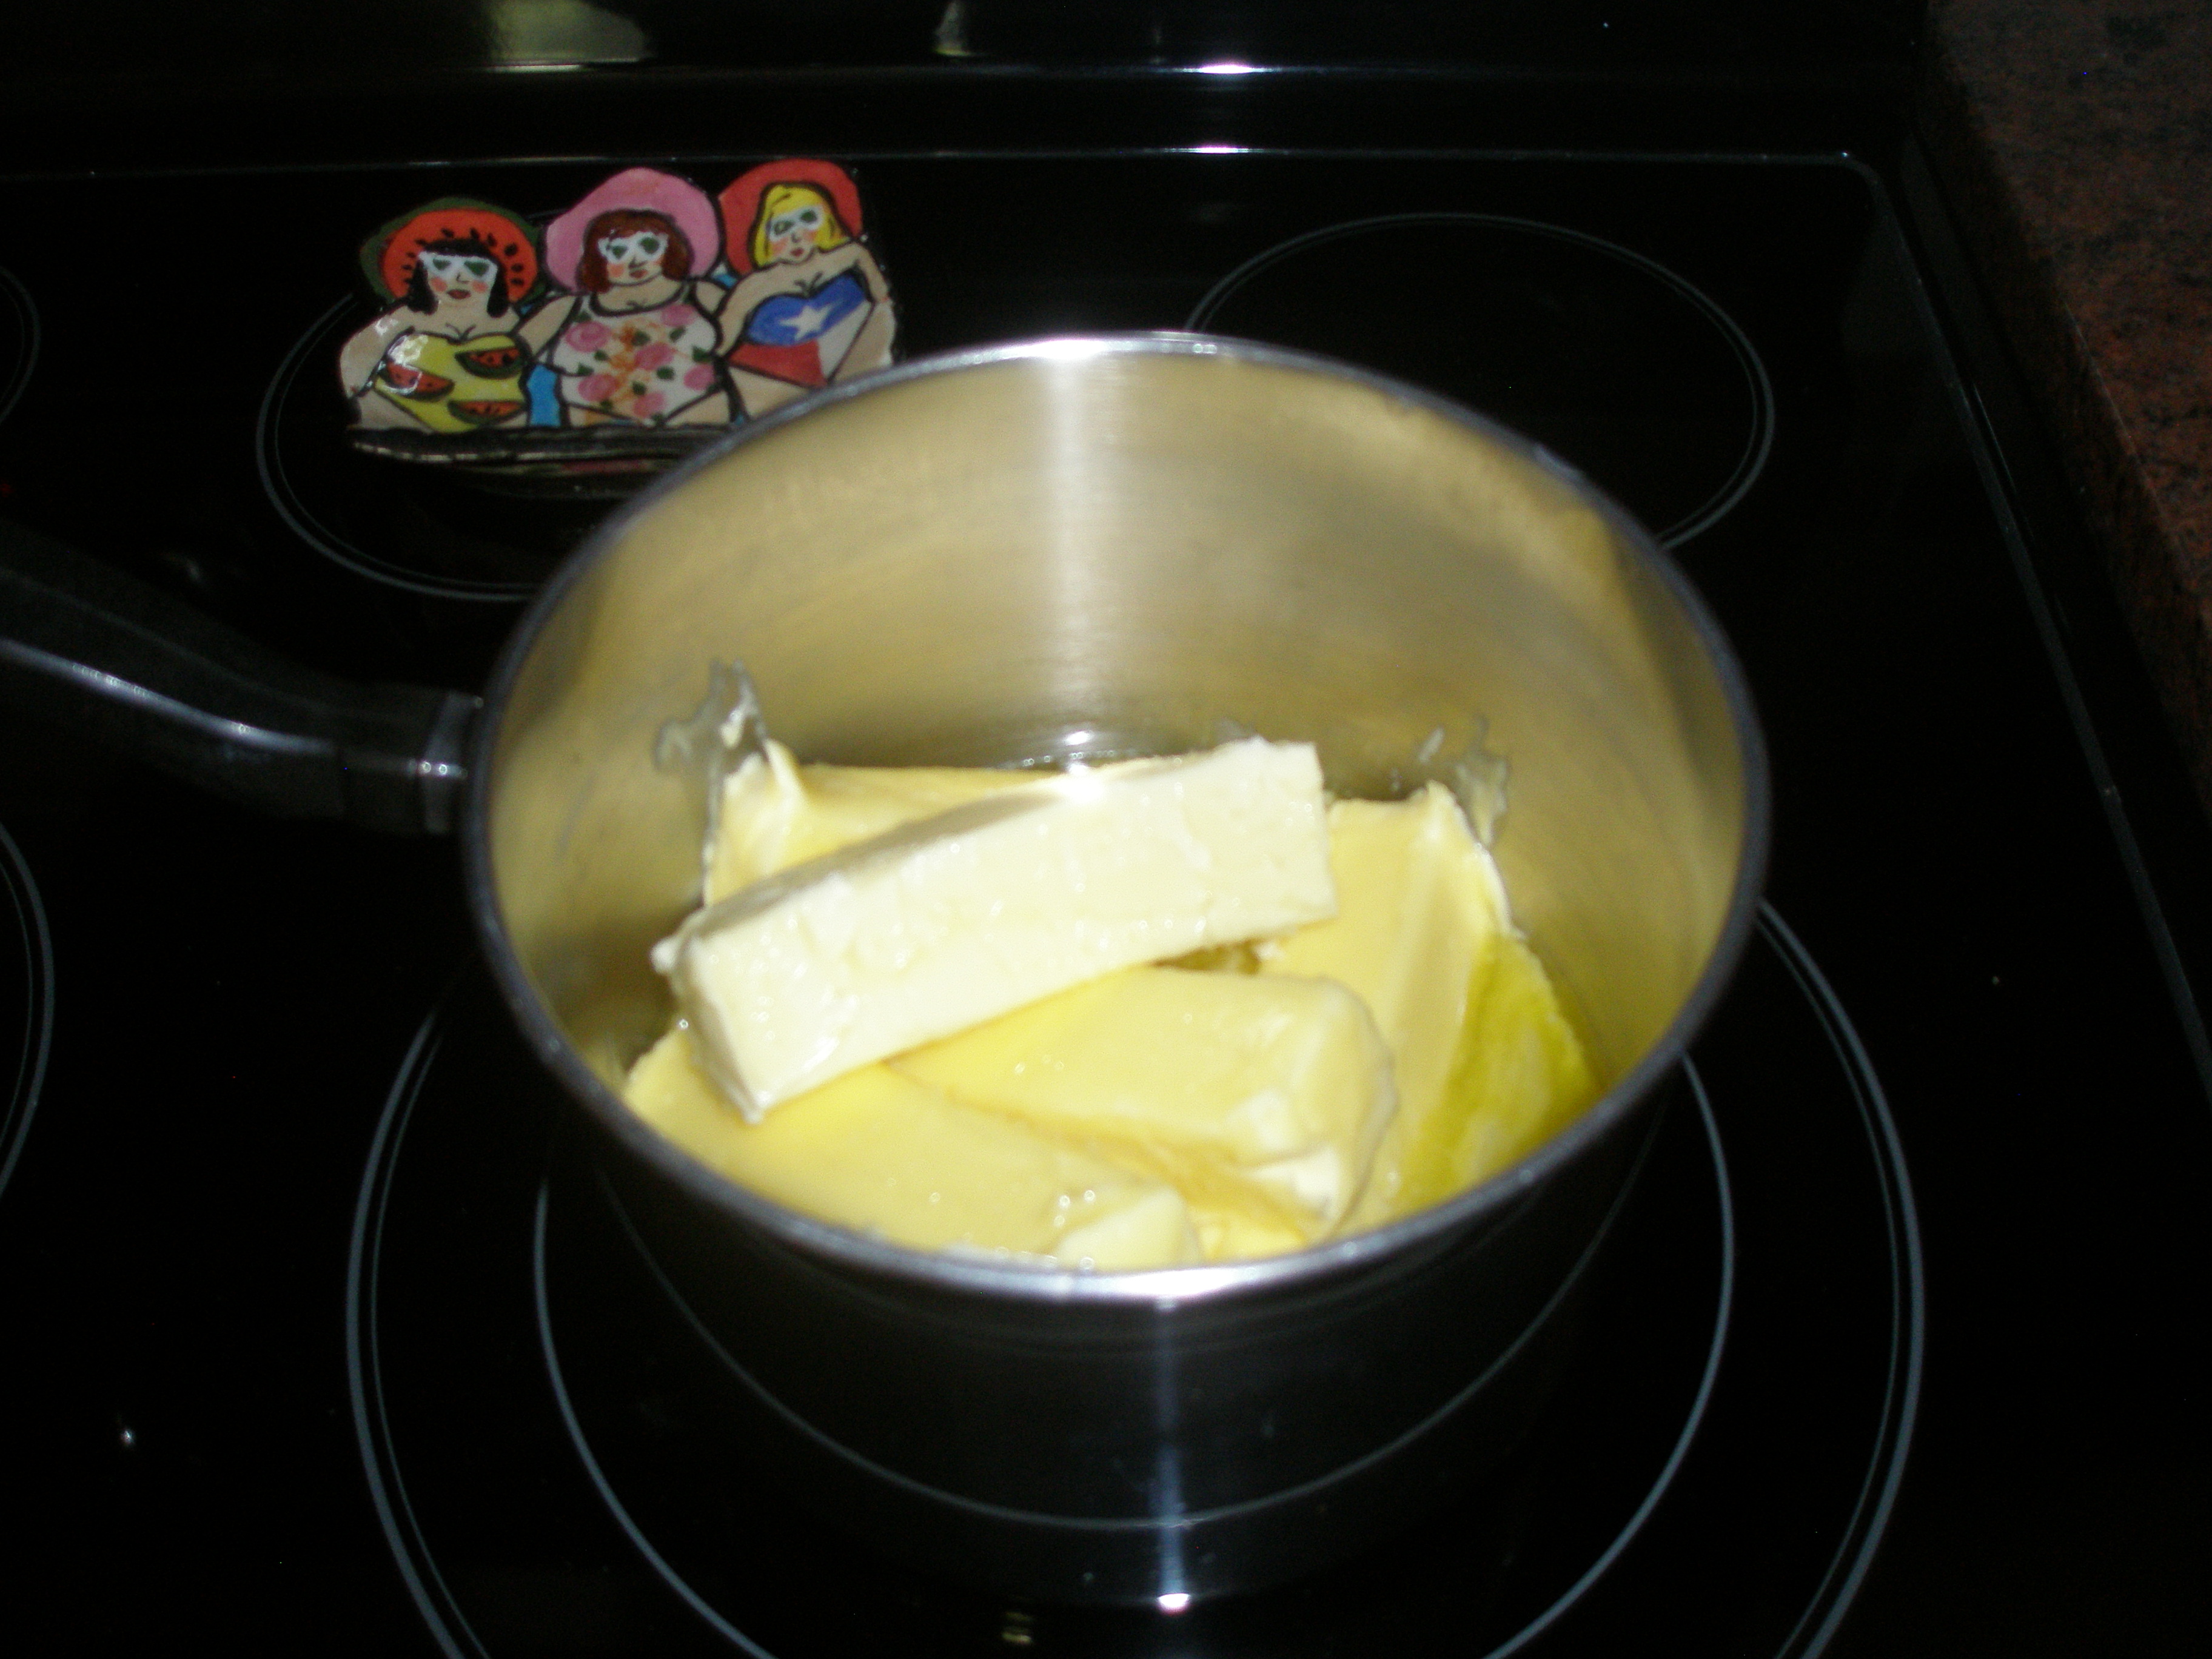
When I make ghee I use 6 sticks (24oz.) of butter. You will lose some volume in cooking out the milk fat, but you can count on having 11-11.5 “cakes” of ghee. Here is the calculation—one cake =2 oz =1/4 cup =4 tbls. You can use less butter of course, but since I’m making it, I get it all done and it stores well in the refrigerator.

Put all your butter in the 3 qt. sauce pan. Using a smaller pan than 3 qt, will cause a lot of splatters on your stovetop, so go big. (and it does foam up) My range has heat settings of “low, 2, 4, 6, 8, high” and I use 3-4.. No need to rush it and burn your ghee, cause it almost cooks itself. You don’t need to stir it or even watch it at this stage.
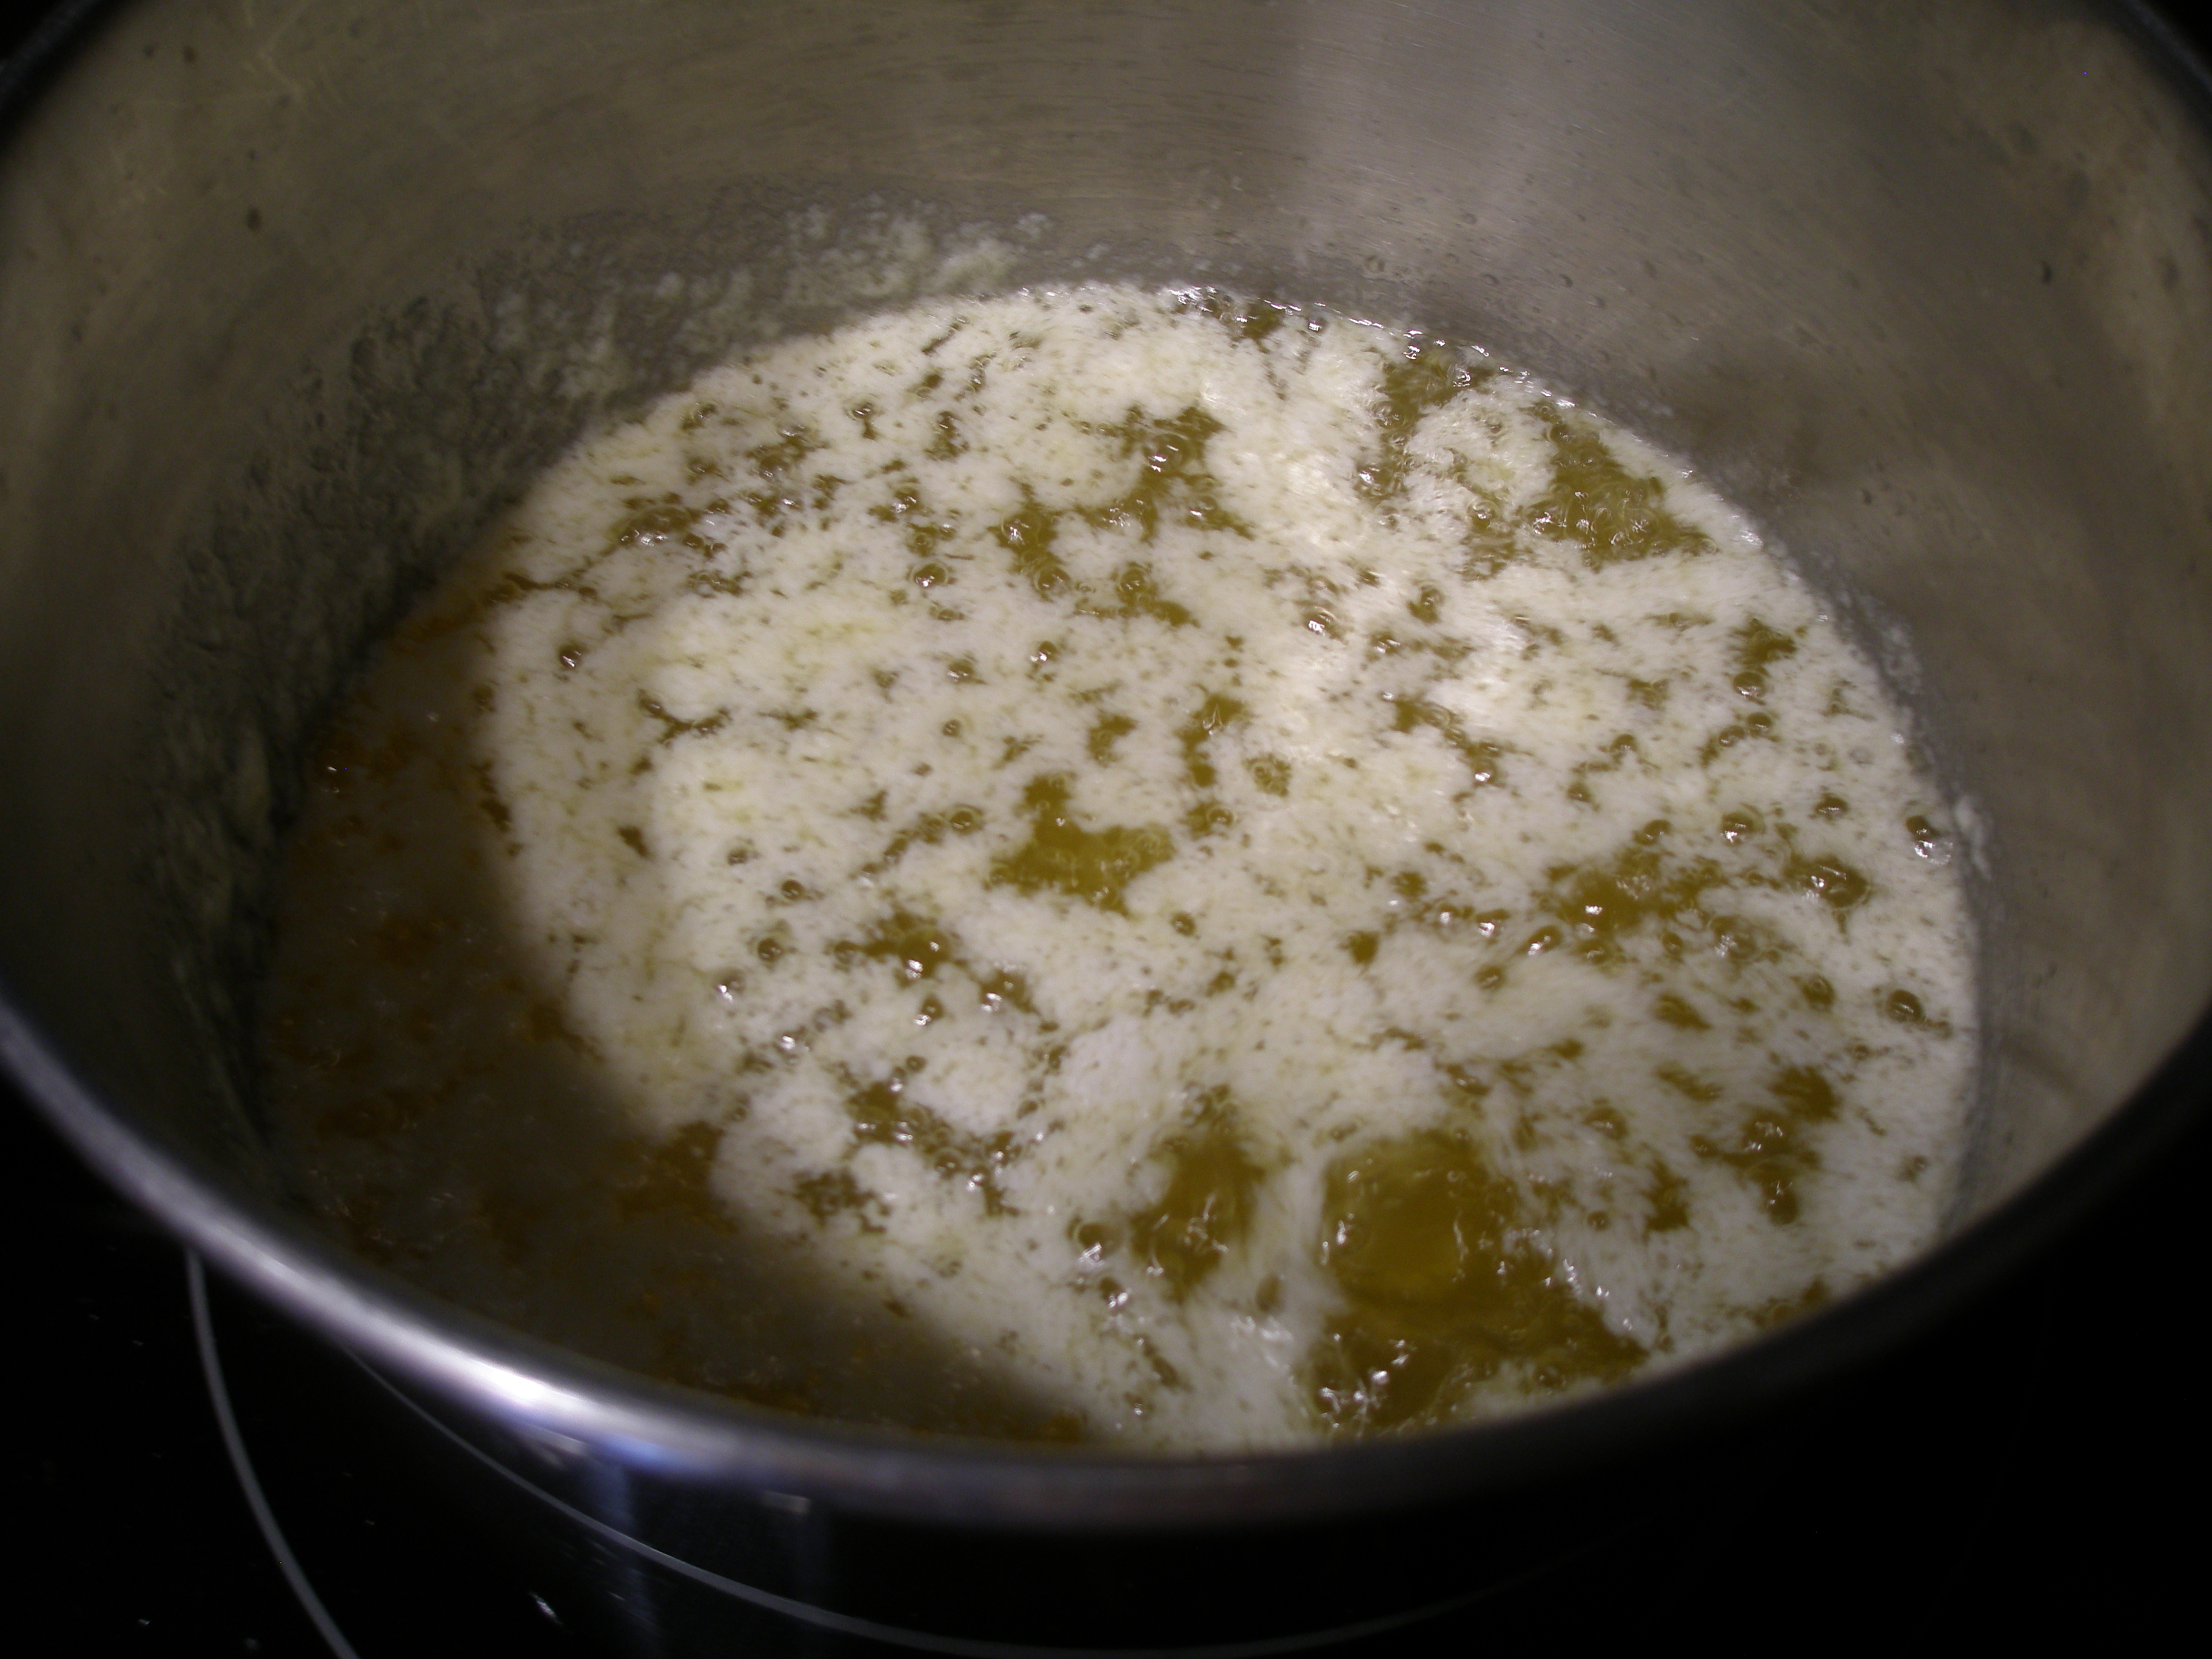
After 10-15 minutes, you will hear a lot of activity going on in that pan. You can check it now. Ghee goes through several stages of foaming and boiling. BE VERY CAREFUL, THIS IS BOILING OIL! Not one for the kids to help with. I don’t stir it.
Get ready for final stage
After about 35 minutes you will see a stage of little foam, this foam will boil away and you will have clear pot of oil.( Last picture) This is the part where you start to hover.
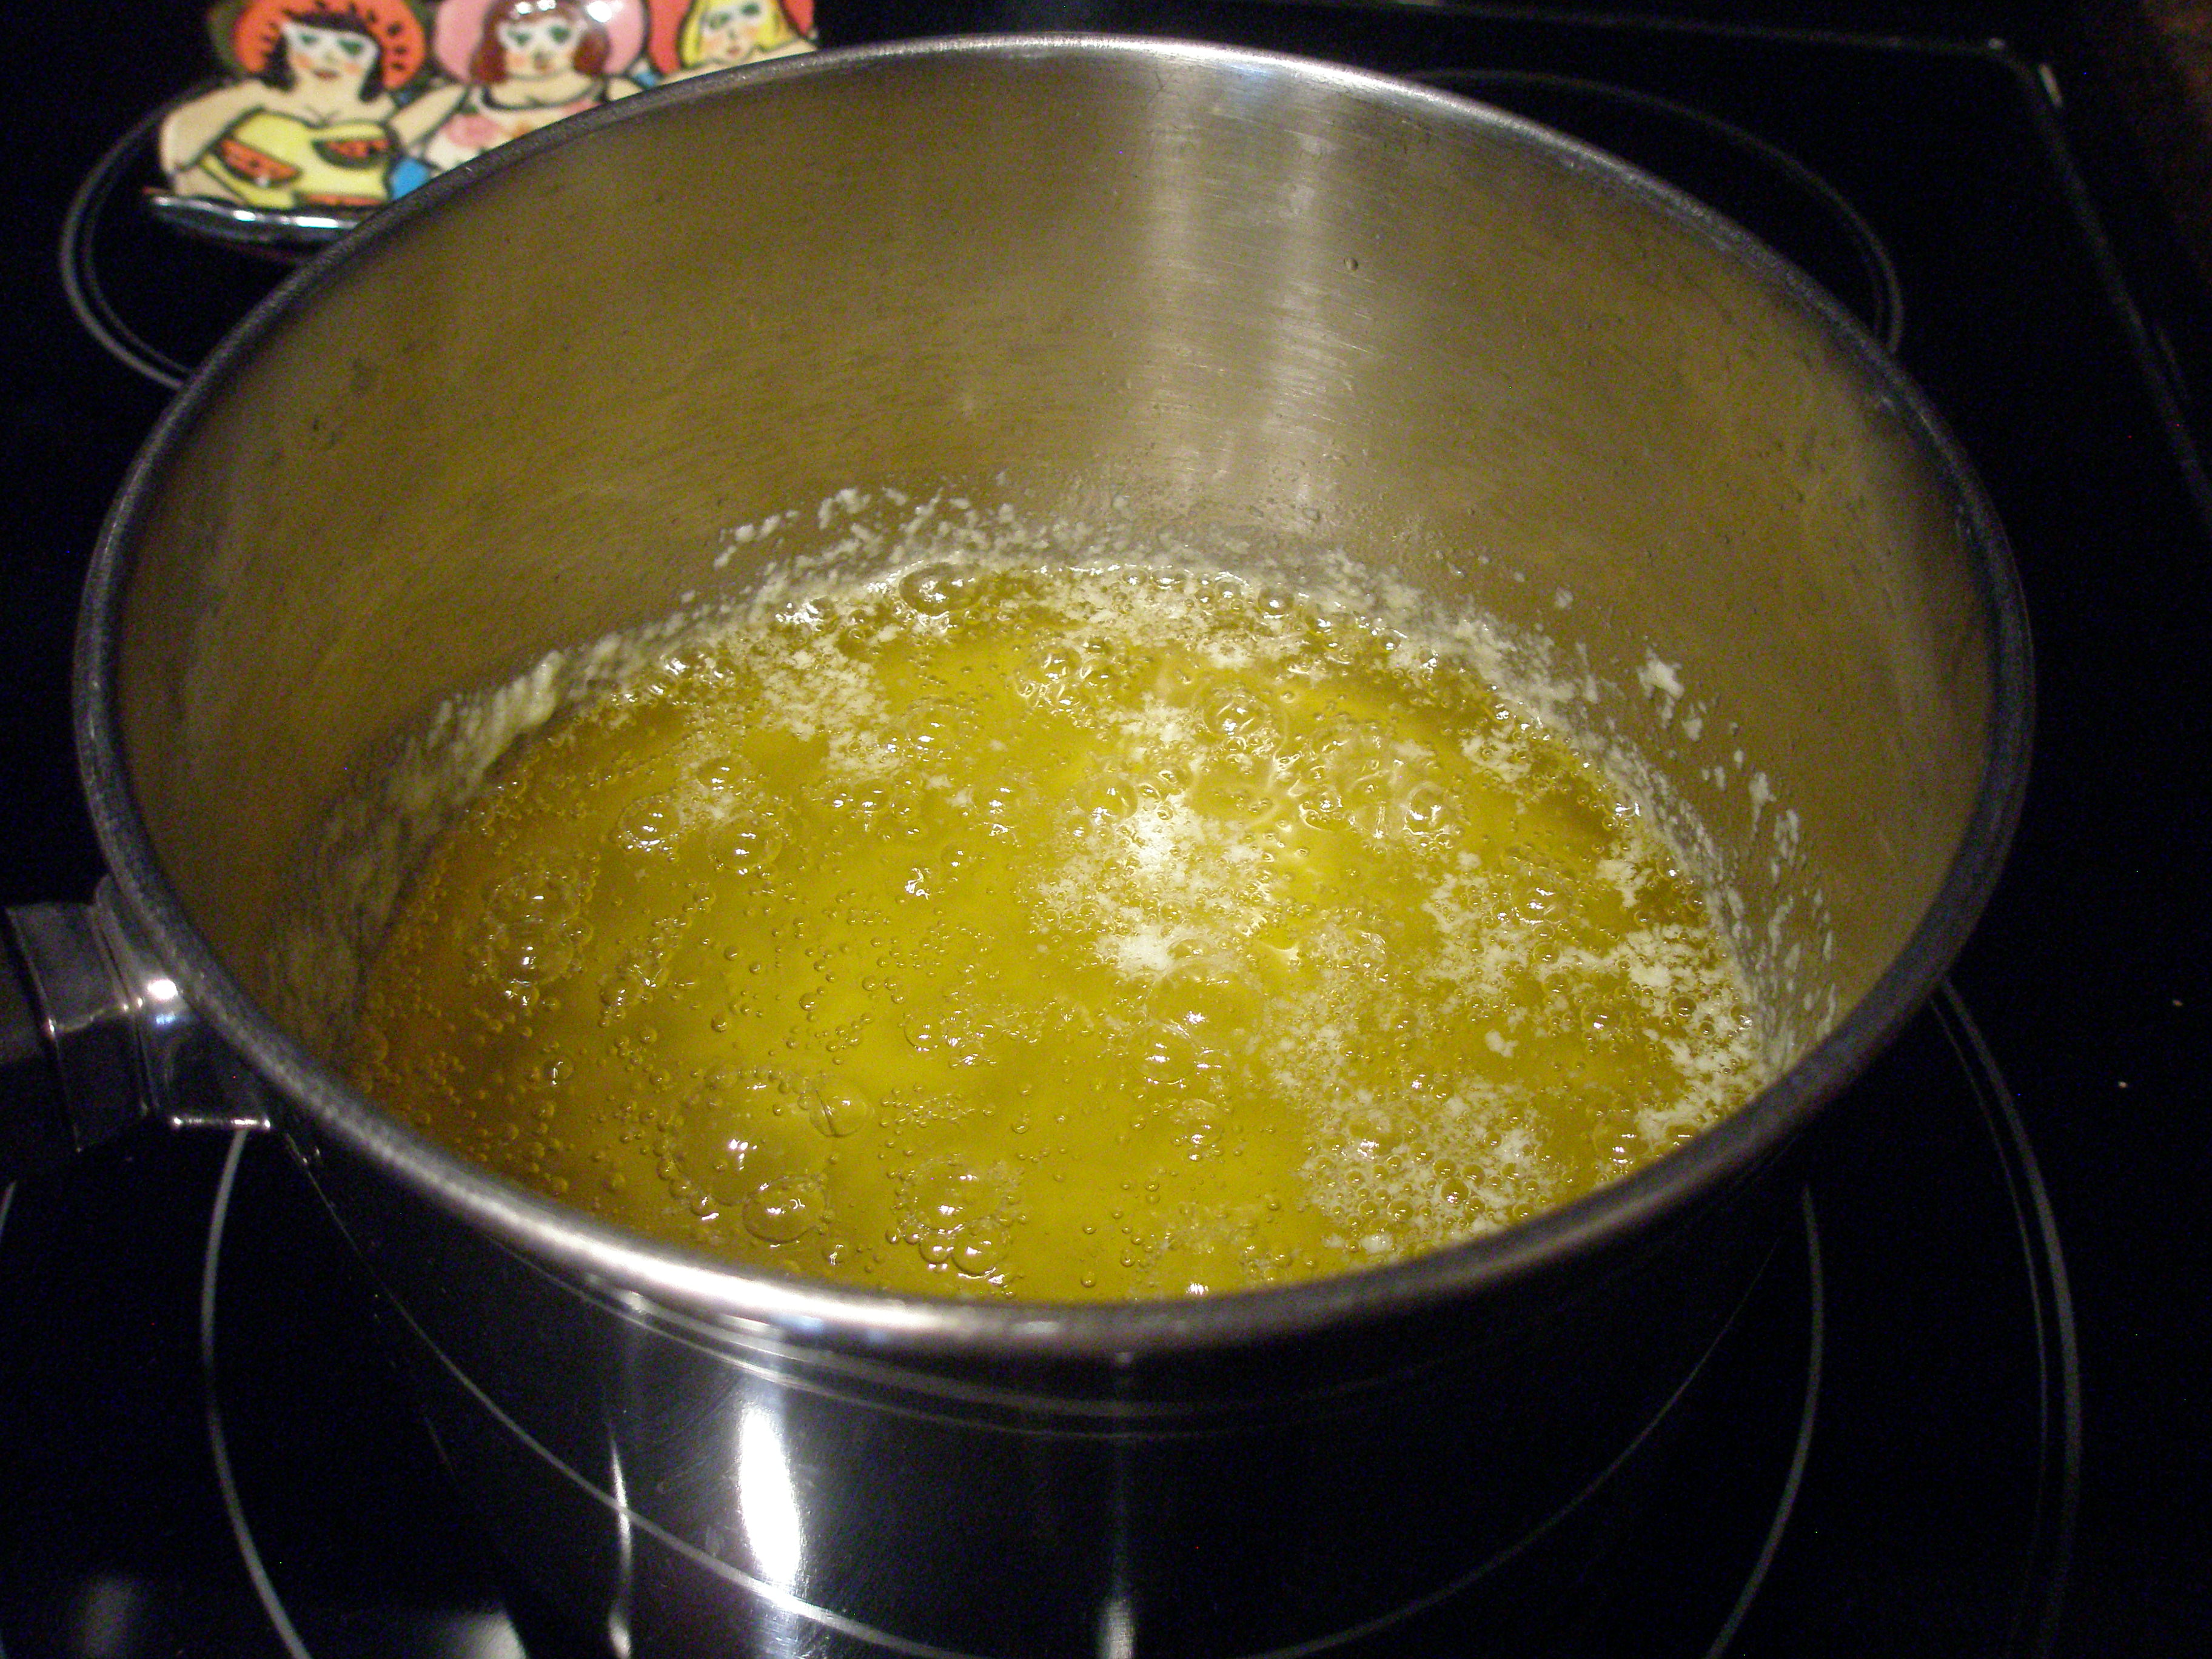
Final stage right before reddish particles form
It will start to foam lightly again. Watch carefully now to see little specks of reddish particles stuck to the bottom of the pan. This is when your ghee is done!. Remove from heat and cool slightly.

Pour it thorough your strainer lined with cheese cloth into the bowl.
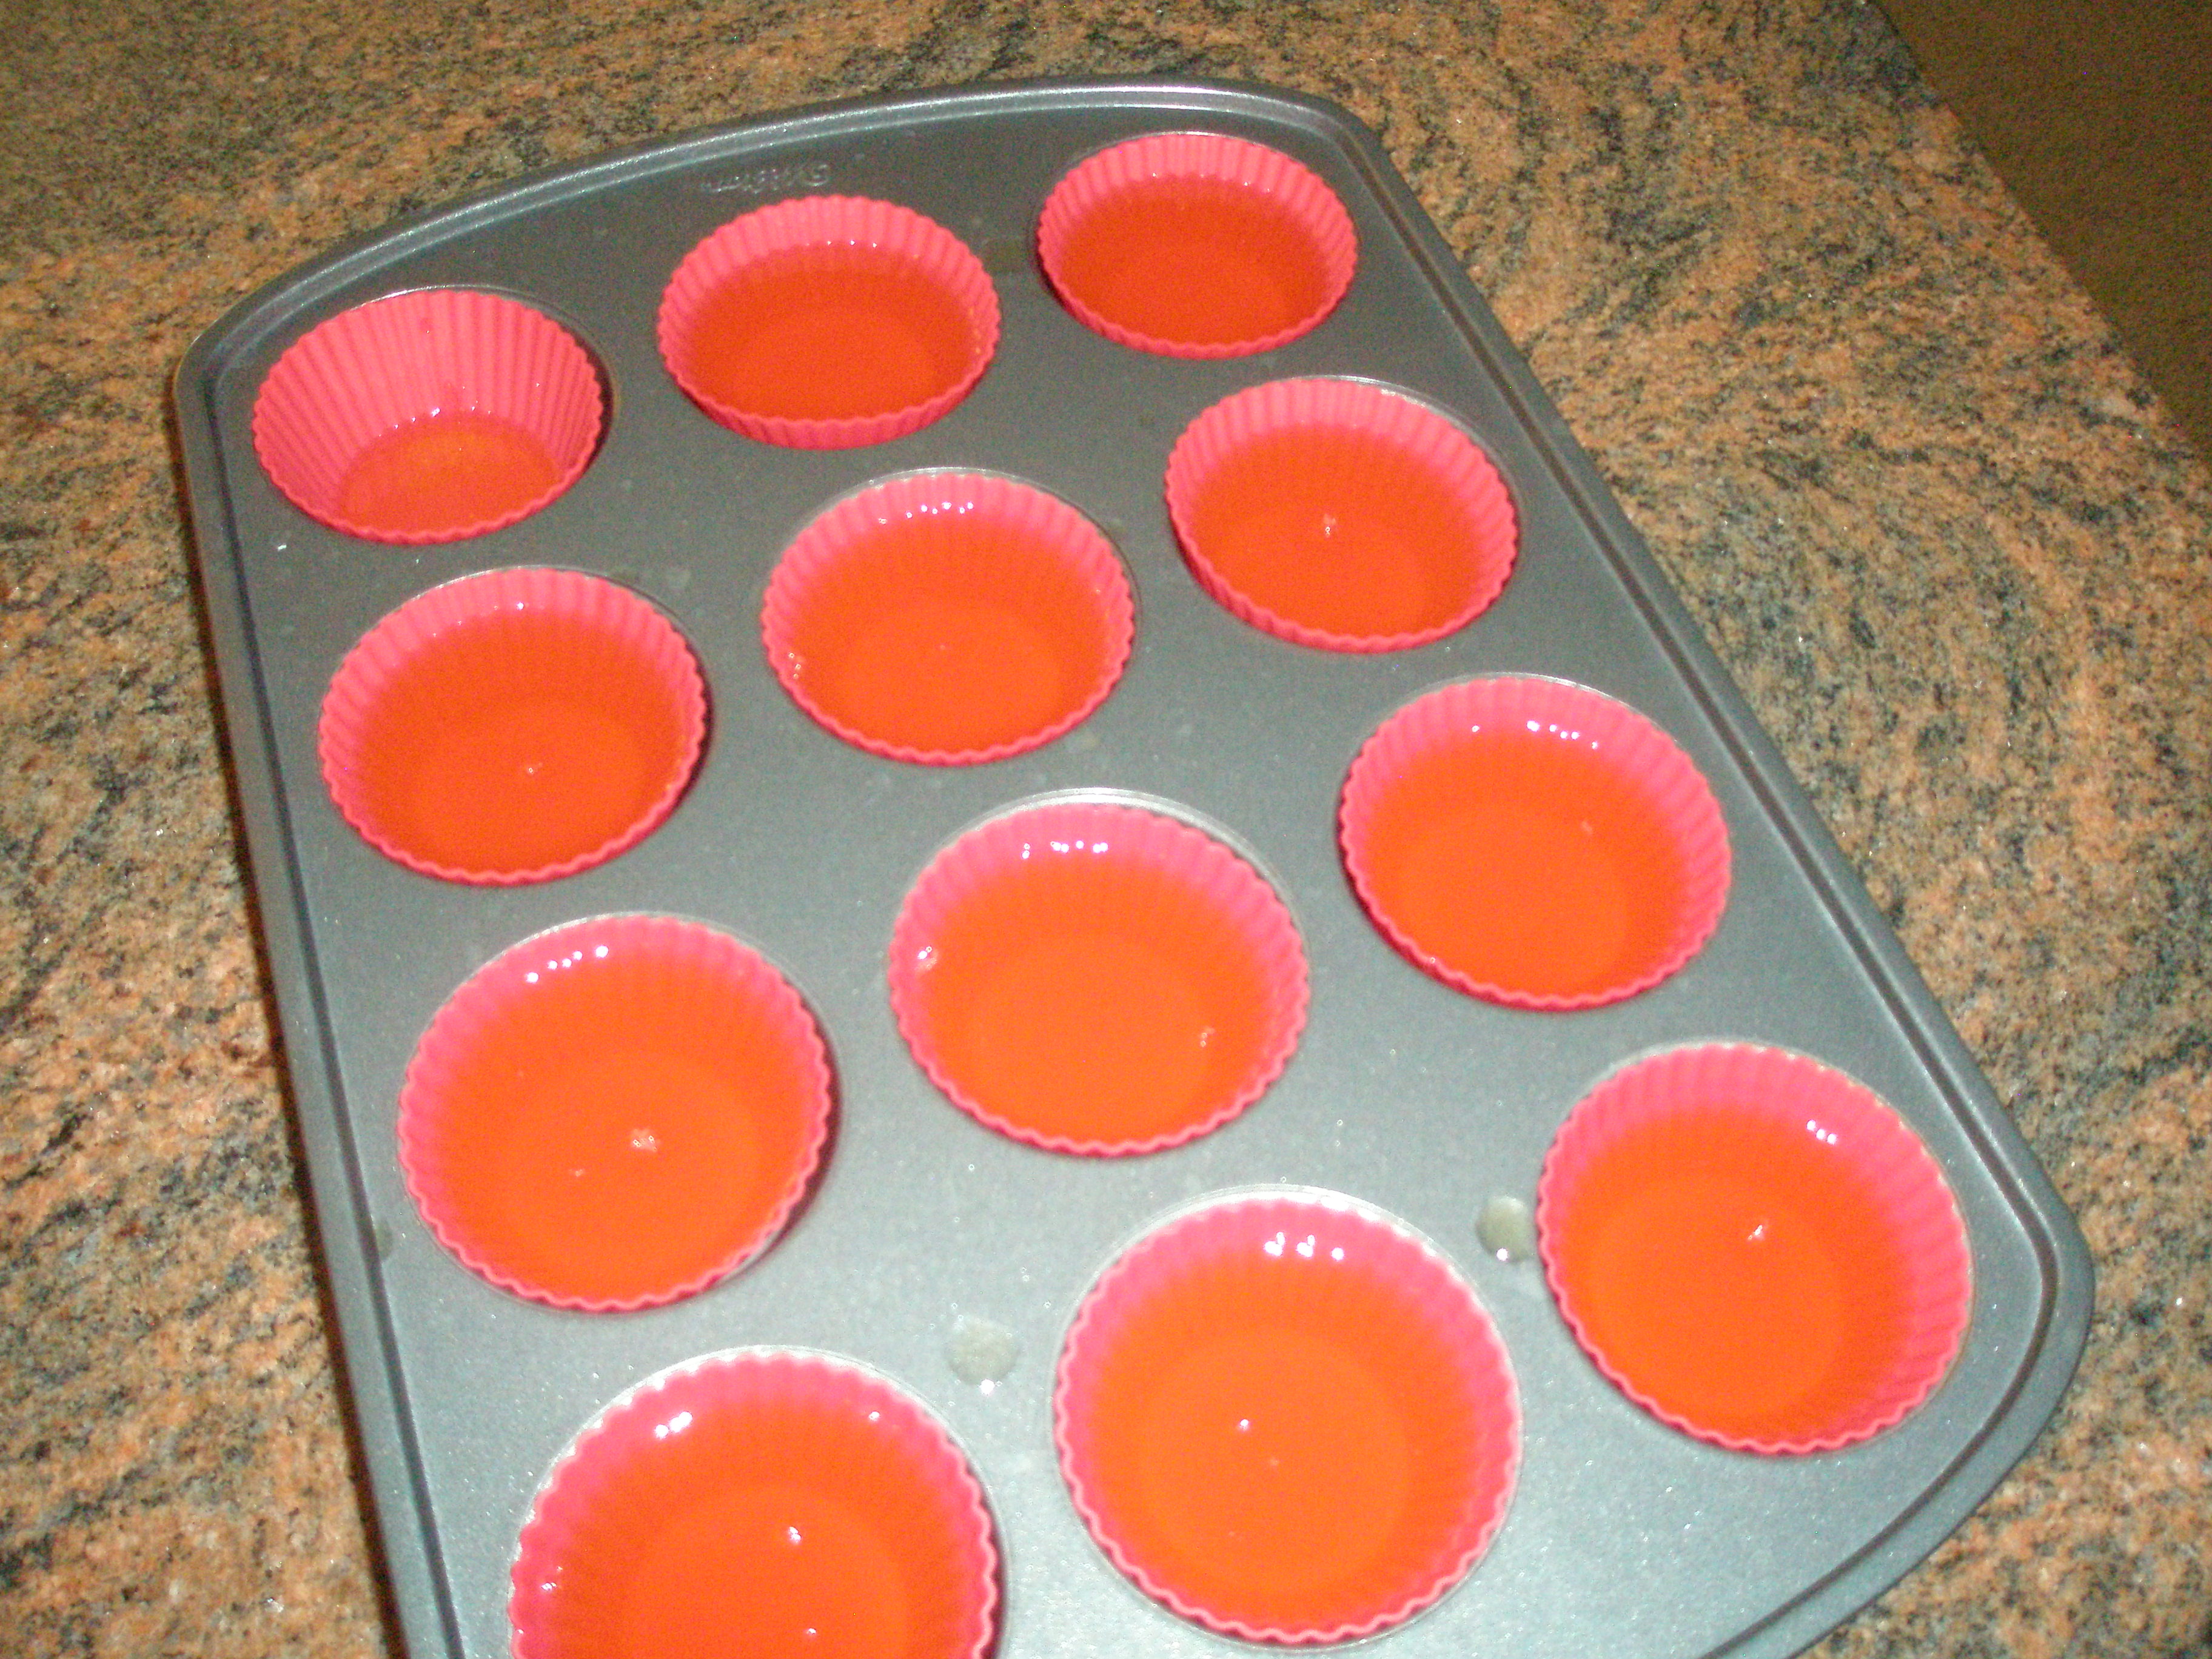
Now using your ¼ cup measuring cup, ladle into your cupcake liners. Stick in refrigerator until solid. Peel off the silicone liners and store in refrigerator until needed. I wipe my utensils out with paper towels before I put in the dishwasher, so I don’t clog my drain.

All done!
ABOUT GHEE http://www.care2.com/greenliving/15-amazing-benefits-of-ghee.html
